Suggested Fabrics & How Much
This pattern was designed for 70 Denier Sport Nylon Taffeta, 2-Ply Nylon Supplex, 70 Denier Nylon Ripstop and Nonstretch Lightweight Cotton. All of the fabrics used in the sewn examples used on this website and on my instagram feed were purchased and are available online at, The Rain Shed.
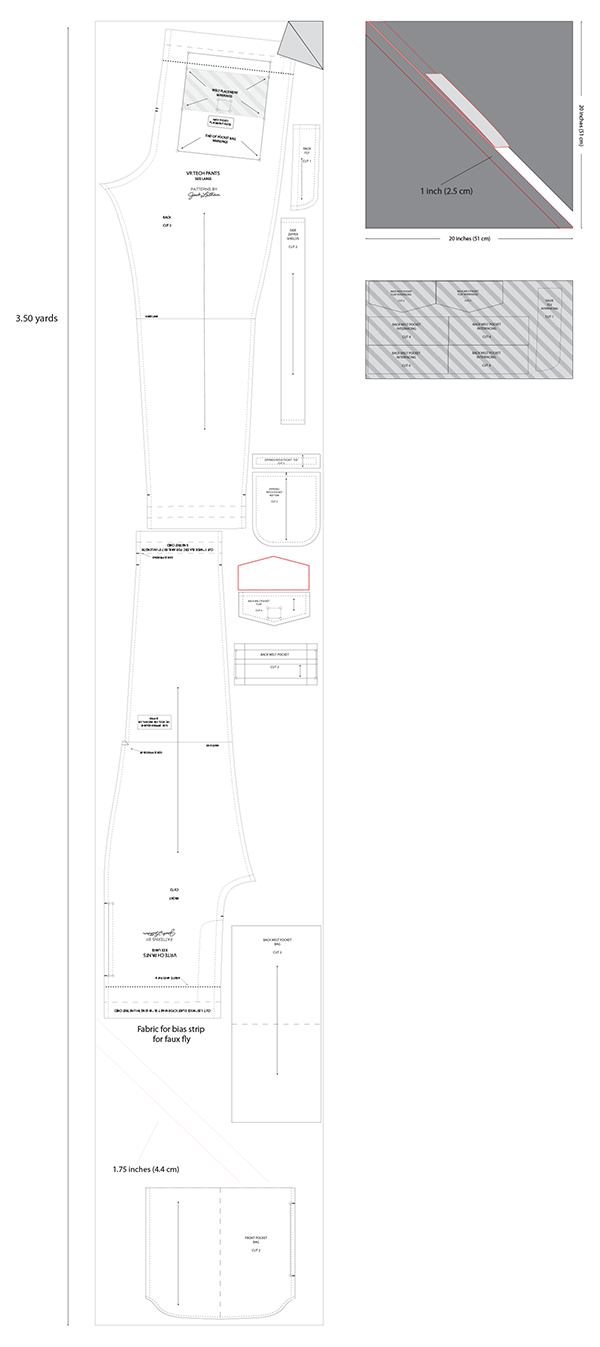
The advanced version of this pattern will require 2.5 yards to 3 yards of 60″ wide fabric. 44″ to 45″ wide fabric will require 3.5 yards. If you are going to use a constrasting piping on the side zippered pockets, that will require an extra 20″ x 20″ square of fabric. Amount depends on size, XL requires more fabric because the front has to be moved down further on the layout. As an example the simple sew version of small-large requires 1.75 yards, while the XL simple sew requires 2.50 yards. Please refer to the cutting layouts below as a guide for cutting out your pants.
A Word About Interfacing
The advanced version of this pattern requires interfacing in the back pocket flaps, welt piece and back panels where the welt is placed. The simple version requires no interfacing. I have tested many types of interfacing with nylon fabrics. You get some pretty weird results with non-woven interfacing when you try to iron it onto synthetic fabric like nylon. It might look ok at first but when it begins to cool after ironing the nylon gets this ugly crinkling effect. And after handling it, it pretty quickly slides right off the nylon. The best results were using a Tricot Fusible. It still doesn’t do a great job of sticking to the fabric. But it stays in place long enough to get it sewed in and then will stay put. The only problem is the interfacing on the back panels for the welt pockets. This will loosen and hang loose behind the back pocket bag, where not sewn. I just cut it away about 1/2 an inch around the welt area. Tricot interfacing can be purchased at Fabric.com.
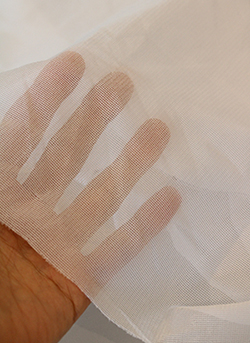
FusiKnit Tricot Fusible Interfacing
Cutting Bias Strips
The advanced version requires two kinds of bias tape, one for piping and another for closing the raw seam on the faux fly. Directions on how to cut and make piping and seam tape are in the sewing directions. But the cutting guides below do show how to layout to include those.
Notions for Advanced Version
2 – 26″ in length Traverse Cording (can be purchased at Amazon.com (here)2 – 18”, #3 Closed End Nylon Zippers2 – 6″, #3 Closed End Nylon Zippers1.50″ Knit Elastic (length to cut for size is written on pattern)1 inch Knit Elastic (length to cut for size is written on pattern)
Simple version requires no notions.
Marking Notches & Placement Holes
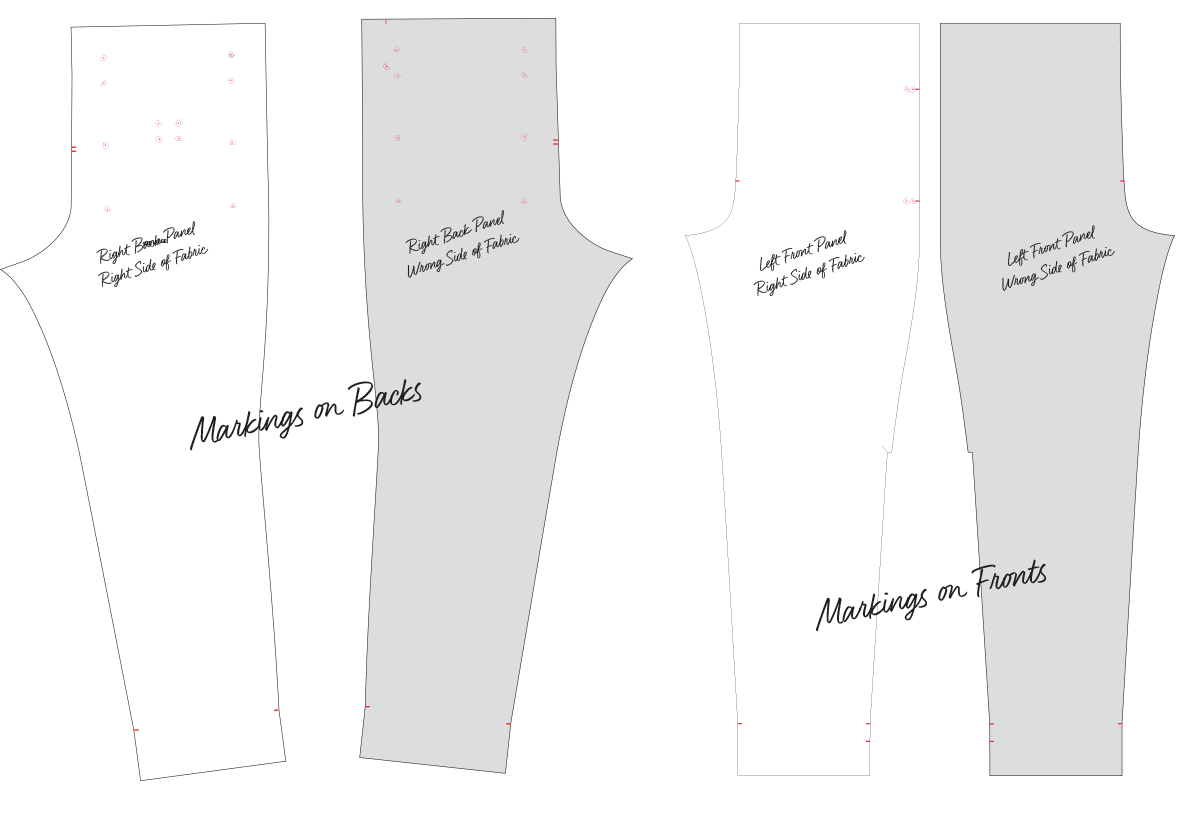
For the advanced pattern most notches and placement holes on the back panels should be marked on both the right and wrong side of the fabric. The velcro placement holes only need to be on the right side and the elastic waist side guide line only need to be on the wrong side. The front markings are same on right and wrong side minus the front slit pocket markings. You must flip the front and back pattern over to mark the wrong sides. To highlight the small placement hole marks, I like to circle them so they don’t get lost or confused with fuss :D. Your markings should look like the image above.
For the simple sew version there is no need to repeat notches or placement marks on the wrong side.
Layout Guides
Fabric 60″ (152 cm) Wide, Sizes Small to Large, Simple Sew Version
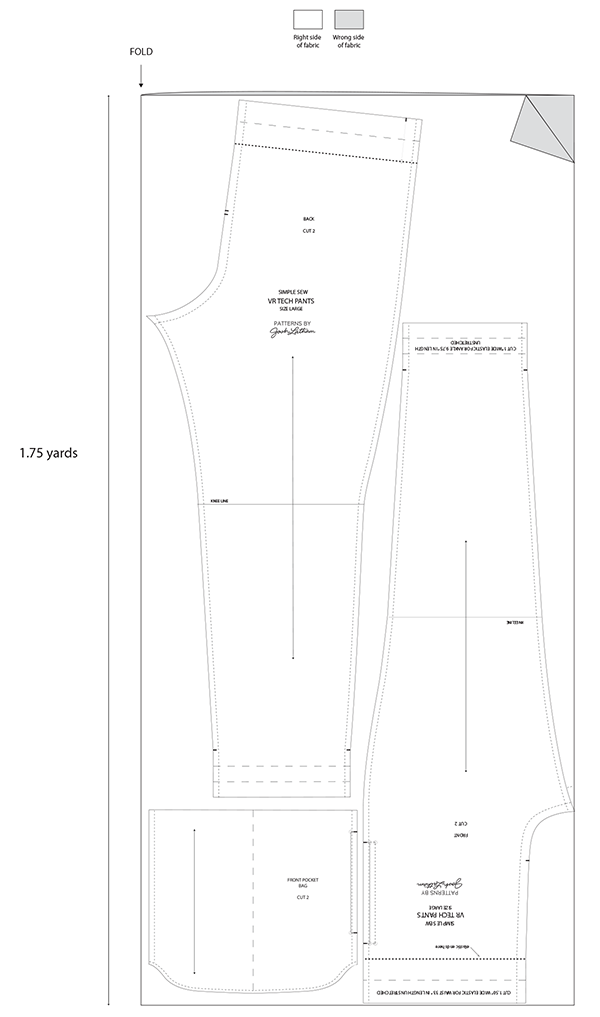
Fabric 60″ (152 cm) Wide, Sizes Small to Large, Advanced Version

Fabric 60″ (152 cm) Wide, Size XL, Simple Sew Version
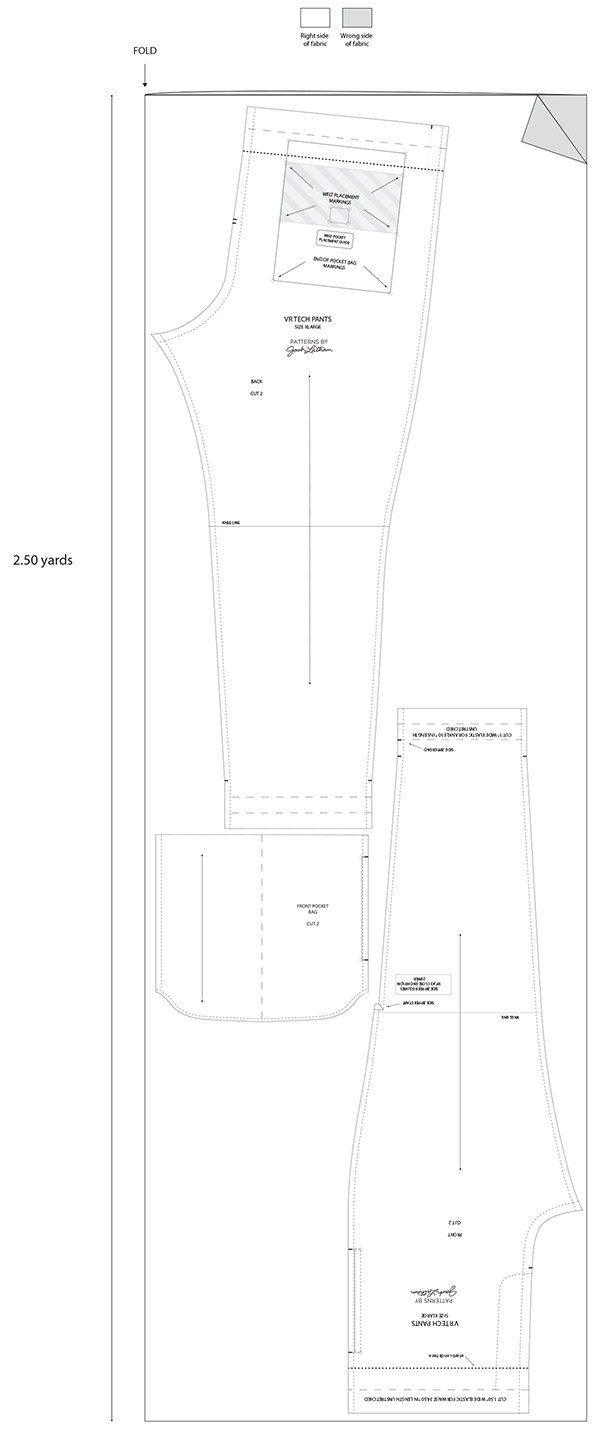
Fabric 44 to 45″ (115 cm) Wide, Sizes Small to Large, Advanced Version
